It happened after I checked and emptied the waste tray. Suddenly the printer complained the waste tray was missing when it was clearly inserted all the way into the tray slot. After a few printer reboots and reseating the tray, I realized it was not a glitch in the software or dust gathered somewhere blocking the sensor.
I got curious how the printer firmly believed the tray was missing, so I checked the tray to notice a protruding area that looked like a docking portion to something. If it was, there should be a sensor far inside the slot. I used my phone as a flashlight to peek in the slot and noticed something black dangling on a wire. Apparently, it was a sensor knocked out of its place.
I tried a few different approaches to replace the sensor to its place without success as,
1. I didn't have any reference to move it to its intended location.
2. I needed a long tong or tweezer to finish the operation successfully.
After reading some online posts from people who tried to correct the issue themselves(and failed), I decided it was not a sound decision to disassemble the whole printer to reach the sensor block and reseat it.
Instead, I looked up the Xerox 8570 service manual to locate where the sensor wire leads to. According to the manual, the waste tray sensor was connected to P/J102 on the I/O board(see page 7-6 on the manual).
The I/O board itself is located on the top left corner of the printer when you see the printer from the side where the access door to the waste tray/maintenance kit is. In order to reach the I/O board, the right side cover needs to be removed. Following instruction on page 4-6 and 4-7 of the manual, I easily removed the right side cover to reveal the I/O board:
On the top left corner of the I/O board, I located the P/J102 jumper with 3 wires in blue, red, and black color. Apparently, these wires needed to be connected in some combination to make the printer to believe everything's okay down there in the waste tray slot.
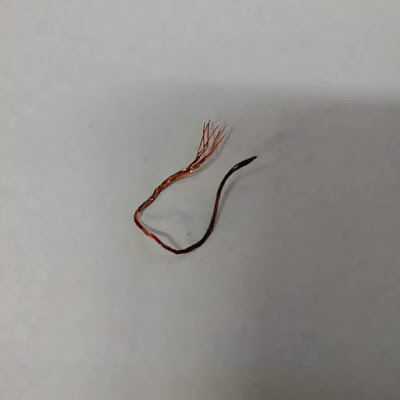
In order to test different combinations of wire connection, I stripped a short copper wire(I had to burn out the coating, to tell you the truth). I bent the prepared wire to make it easier to touch each pin on the jumper to try simulating different combinations of wire connection.
After a few trials, I found out the right combination was to connect ALL THREE pins together. Connecting the three pins stopped the error message for missing waste tray, and the printer prompted to close the exit door. Voila!
I put the wire between the pins in the way shown below so that it contacted three pins and stayed there.
Then, I plugged the three pin socket back to secure the wire (be careful so the copper wire doesn't touch any other components on the I/O board. That is why I bent the wire away from the I/O board as a precaution).
After restoring the covers and doors, my Xerox 8570 was finally back to normal! (Sans some ink sticks :) )
I am so glad I could solve this issue without much effort and hope this instruction helps people with the same issue. :)
Disclaimer: As usual, please note if you follow this instruction, you are doing it at your own risk. If you forget to put back the waste tray in, you will end up with a mess. Leave the waste tray in the slot at all times except to empty the waste once in a while, Okie? :)
Also, if you are looking for REAL saving on your car insurance, check this out. They only charge you for the mile you drive!


Thank you, this has saved my life. I have an colourQube 8870 and downloaded the service manual, found the same jumper and fixed it with a piece of chewing gum wrapper hahah AMAZING
ReplyDeleteGreat ! Thanks a lot :-)
ReplyDelete